
For those of you that are still following this blog, I first want to say a big Thank You! When I started it, I figured the only people that would read it would be my sisters and my parents, so it was a surprise when I saw how many "clicks" I was getting.
All of the reader love has lead me to create a new site, with better layouts, organization, and overall look and feel. And because of that, I will stop posting new content here soon, and move everything other to the new site, where you can still follow via RSS feed, or see my posts on Twitter and Facebook.
Thanks again!
Deck
Wednesday, July 14, 2010
Deck's Shrimp Scampi
THIS IS A REPOST FROM DECKONFOOD.COM. http://deckonfood.com/?p=490
Almost every time we spend more than a couple days with Jennifer's sister, I get a request for shrimp scampi. According to her, mine is the only one that she really likes (and I have no problem going along with that). Shrimp is one of those things that is very tasty and quick to cook, but at the same time can be easily overcooked, so the key to this dish is cooking the shrimp over medium-low heat, flipping them only once. I started cooking this about 4 years ago, and have worked to refine it and make it delicious.

The shrimp can be served in a number of different ways, but my favorite is over pasta. And tonight I took it up a notch making fresh homemade pasta which was delicious.
At this point, the recipe is simply for the shrimp preparation itself, as I'm still working through some sauce ideas. I think if I take the remaining white wine/butter sauce, and add a little bit of heavy cream and some seasoning I might have something. In the meantime, I use a creamy pesto sauce from Knorr's, which has been a fan favorite.
Ingredients:
 Step 1 - Over medium-low heat (about 4 or 5 on the 1-10 dial), melt the butter in a 10-inch skillet. Once the butter is foaming, just before it begins to brown, add the garlic and sauté for about 2 minutes until it starts release its aroma.

Step 2 - While the butter is browning, remove the tails from the shrimp and season with salt and pepper (about a 3 finger pinch of salt per pound, pepper to taste). You don't want to put the salt on too early or it can dry out the shrimp and leave it a little tough.
Step 3 - Add the shrimp to the butter and garlic. Make sure all of them are laying flat in the skillet. Once theyare in the butter, add the white wine. Cook for about 2 minutes (until just cooked through), and then flip over.
Step 4 - Just before the shrimp is done, sprinkle the chopped basil over the shrimp. Then remove with a slotted spoon, and serve over the top of your pasta or rice.

Almost every time we spend more than a couple days with Jennifer's sister, I get a request for shrimp scampi. According to her, mine is the only one that she really likes (and I have no problem going along with that). Shrimp is one of those things that is very tasty and quick to cook, but at the same time can be easily overcooked, so the key to this dish is cooking the shrimp over medium-low heat, flipping them only once. I started cooking this about 4 years ago, and have worked to refine it and make it delicious.
The shrimp can be served in a number of different ways, but my favorite is over pasta. And tonight I took it up a notch making fresh homemade pasta which was delicious.
At this point, the recipe is simply for the shrimp preparation itself, as I'm still working through some sauce ideas. I think if I take the remaining white wine/butter sauce, and add a little bit of heavy cream and some seasoning I might have something. In the meantime, I use a creamy pesto sauce from Knorr's, which has been a fan favorite.
Deck's Shrimp Scampi
Serves 2Ingredients:
- 1 lb. Shrimp, shelled and deveined
- 1/4 cup sweet cream butter
- 1/4 cup dry white wine
- 1 Tbsp chopped fresh basil
- 3 cloves garlic, chopped
- Salt and pepper for seasoning
Step 1 - Over medium-low heat (about 4 or 5 on the 1-10 dial), melt the butter in a 10-inch skillet. Once the butter is foaming, just before it begins to brown, add the garlic and sauté for about 2 minutes until it starts release its aroma.Step 2 - While the butter is browning, remove the tails from the shrimp and season with salt and pepper (about a 3 finger pinch of salt per pound, pepper to taste). You don't want to put the salt on too early or it can dry out the shrimp and leave it a little tough.
Step 3 - Add the shrimp to the butter and garlic. Make sure all of them are laying flat in the skillet. Once theyare in the butter, add the white wine. Cook for about 2 minutes (until just cooked through), and then flip over.
Step 4 - Just before the shrimp is done, sprinkle the chopped basil over the shrimp. Then remove with a slotted spoon, and serve over the top of your pasta or rice.
Jennifer's Rhubarb Crisp
THIS IS A REPOST FROM DECKONFOOD.COM. http://deckonfood.com/?p=475
When it comes to summer time food, there is nothing that says summer to me more than rhubarb. Every summer, my grandmother would turn her rhubarb into a plethora of delicious dishes from pies to jams to breads. I was excited when I found out that Jennifer is a rhubarb fan as well. In fact, when we first into our house, one of the first things we planted was rhubarb. And while we've not been very successful growing much in our garden, the rhubarb is currently flourishing.
I'm definitely not the only one in the house that can cook. While Jennifer doesn't cook a lot, there are some things that she does really well. And one these things just happens to be one of my favorite rhubarb preparations. The tartness of the rhubarb combines so well with sweet fruits and a nice crumble on the top. Add a little vanilla ice cream and it's a wonderfully simple summer dessert.
Ingredients:
Step 1: Cut the rhubarb and strawberries into bite-sized pieces. You should have 4-5 cups of fruit. Place all of the fruit into a 2-qt casserole dish or 8" square baking dish.
Step 2: In a separate mixing bowl, add the remaining ingredients. Using your hands, mix everything together until it forms into a nice crumble. It should be falling apart, not forming into a dough.


Step 3: Place in the oven and bake for 50-60 minutes until the crumble is golden brown on the top, and the fruit is bubbling around the sides. Serve in a bowl with some vanilla ice cream.

When it comes to summer time food, there is nothing that says summer to me more than rhubarb. Every summer, my grandmother would turn her rhubarb into a plethora of delicious dishes from pies to jams to breads. I was excited when I found out that Jennifer is a rhubarb fan as well. In fact, when we first into our house, one of the first things we planted was rhubarb. And while we've not been very successful growing much in our garden, the rhubarb is currently flourishing.
I'm definitely not the only one in the house that can cook. While Jennifer doesn't cook a lot, there are some things that she does really well. And one these things just happens to be one of my favorite rhubarb preparations. The tartness of the rhubarb combines so well with sweet fruits and a nice crumble on the top. Add a little vanilla ice cream and it's a wonderfully simple summer dessert.
Jennifer's Strawberry Rhubarb Crips
Serves 6-8Ingredients:
- 1 pint fresh strawberries

- 2-3 cups fresh chopped rhubarb
- 1 cup white granulated sugar
- 1/2 cup sweet cream butter at room temperature
- 3/4 cup flour
- 1 tsp cinnamon
- 1/2 tsp ginger
- 1/2 tsp salt
Step 1: Cut the rhubarb and strawberries into bite-sized pieces. You should have 4-5 cups of fruit. Place all of the fruit into a 2-qt casserole dish or 8" square baking dish.
Step 2: In a separate mixing bowl, add the remaining ingredients. Using your hands, mix everything together until it forms into a nice crumble. It should be falling apart, not forming into a dough.
Step 3: Place in the oven and bake for 50-60 minutes until the crumble is golden brown on the top, and the fruit is bubbling around the sides. Serve in a bowl with some vanilla ice cream.
Deck's Rules of Steak
This isn't a post about John Howie's restaurant Steak (though I'm sure I will be writing one at some point). No, this is about that food of the Gods, steak. Without a doubt steak is my favorite food. I could eat a well-cooked (not to be confused with well-done) steak any day of the week. There is nothing that makes me more upset when it comes to food than someone that cooks a steak poorly. I've already written a couple posts that involve steak (Craftsteak review and my grill pan), but nothing that is just dedicated to the delectable dish itself. So I decided that on this beautiful Seattle summer evening, I would come home, throw a couple steaks on the grill, open a beer, and then kick back and write a post about my favorite food.

My taste for steak has evolved much like my taste for other foods. But a lot of the evolution came with budget more than anything else. When I was in college, I didn't have a lot of money, so I would only buy steak for myself when it was on sale. Usually that was a couple day old chuck steak or every now and then a sirloin. I would take it home and put it on the Foreman grill that night, not even saving it. When I moved to Seattle, I continued to purchase sirloin steak, shopping at places like Safeway. When I had a few extra dollars, I would go to Whole Foods and get the sirloin from there. It was usually thicker cut, which was exciting. Finally, when I got my most recent job, and had some more money, I stepped up my steak level. Now, it's all about the thick cut ribeyes from Whole Foods, and special occasions call for the dry-aged ribeyes.
But it wasn't just about buying my steaks, it was also about ordering when I went out. One of the first place I remember going was the Texas Roadhouse, and ordering the cowboy cut sirloin (maximizing my meat to dollar ratio). It was always a good reliable steak. Then I got to try the filet at Ruth's Chris which was a completely different experience; a broiled filet with melted butter. I had never had a filet and it made me feel sophisticated at the time (interesting side note: the filet was the cheapest thing on the menu). My restaurant steak experiences peaked when I had the Waygu chef's dinner at Craftsteak in Vegas. Perfectly prepared, extremely flavorful steak that made everything else seem like hamburger.
All of my steak experiences have led me to develop some strong opinions and my own set of "rules" when it comes to steak. I've never really written them down before, but I figure this is as good a forum as any. So, here are my personal Rules of Steak.

Rule #1: No steak should be cooked beyond medium
Actually, I don't think that any steak should be cooked beyond medium-rare, but I know that some people can't quite do that. However, anything past medium is just not worth it. It loses all juices and flavors and everything that makes steak wonderful
Rule #2: When it comes to steak, fat is a friend, not a foe
What I mean by this is lean cuts of steak don't have the same flavor as the more marbled cut. When I was first learning about steak, Filet Mignon was the steak that I definitely wanted to try. Now, give me a ribeye or a New York strip, something with some fat. And don't cut the fat off prior to cooking. If you want to remove fat from your steak, wait until it has already given it's flavor to the meat.
Rule #3: Let the flavor of the meat shine!
Don't put extra stuff of the steak. Definitely flavor with salt and pepper and other seasonings (I like Montreal Steak seasoning from McCormick). Maybe some peppers or mushrooms. But that's it. No sauces necessary. If it requires A1, then it's messed up. When I had the steak at Craftsteak, it had Salt, Pepper and Rosemary. Other than that it was a beautiful, delicious cut of meat that didn't need anything else.
That's it, just three simple rules. But that's the way it is with steak. Just get a good cut of meat (hugely important), season it well, and cook it well. Right now the best cut of meat I purchase is from the butcher case at Whole Foods. If there is something better, I hope to find it. And I'm sure there will be more and more posts about steak as I try it at different places!
Deck's Fried Chicken
THIS IS A REPOST FROM DECKONFOOD.COM. http://deckonfood.com/?p=428
Tuesday, July 6 was a typical day for me. I'd headed into work in the morning with my coffee and lunch. I was working away, answering e-mails, making phone calls, etc. About mid-way through the day, I saw a tweet come across with some recipes to help celebrate National Fried Chicken Day. Two things crossed my mind. First, I need to figure out when more of these national food days are (almost missed National Grilled Cheese Day too). Second, how was I going to celebrate? I then realized that before leaving, I had pulled some chicken breasts out of the freezer. Needless to say, I was stoked! I spent the rest of the day trying to figure out how I wanted to cook the chicken (well, in between working of course). I thought maybe strips, or I could just fry
 them whole. When I got home, I was still debating when I realized I hadn't pulled out chicken breasts. I'd pulled out chicken legs; even better! And so I got ready to make myself some fried chicken.
This was my second attempt at fried chicken actually. The first time it didn't go so well. The chicken ended upcoming out bland and over breaded. It was there that I realized not to skimp on spices, and how to properly bread the chicken. Let's just say, second time is the charm, and that's why instead of an experience, you are getting a recipe! The spice mix is definitely something you can tweak, as I'm sure I will, but I promise that using this one, you are going to get very moist, flavorful chicken that will have you licking your fingers and wanting more!
Deck's Fried Chicken
Serves 2Ingredients:

- Don't skimp!
- 2 Chicken Legs
- 1 pint Buttermilk
- 2 cups all-purpose flour
- 1/4 cup paprika
- 2 Tbsp Lawry's Seasoned Salt
- 1 Tbsp Garlic Powder
- 1/4 cup ground black pepper
- 2 Tbsp light brown sugar
- 1 tsp Allspice (optional)

Step 1 - Clean/rinse the chicken and pat dry. Separate into thighs and drumsticks. Place the chicken in ashallow baking dish, and pour in the buttermilk. Cover and refrigerator for at least 4 hours and up to 24 hours.
Step 2 - Preheat your oil to 350 degrees. You can either use a small deep fryer like I use, or a pot that holds enough oil to completely submerge the chicken. Use a light oil like vegetable or peanut oil that doesn't add flavor to the chicken.
Step 3 - Mix all of the dry ingredients together in a shallow pan.
 Step 4 - Take one piece of chicken out of the buttermilk, and wipe off the excess. Place it in the spice mixture and coat evenly. Then dip it back in the buttermilk, and then back into the spice mixture (should be buttermilk, spices, buttermilk, spices). Repeat this with each of the remaining pieces.
Step 5 - Place the pieces of chicken gently into the oil so as not to splash yourself, and cook for about 5-7 minutes until the outside is a nice brown texture (go past golden brown, but not quite dark brown). Remove from the oil and place on paper towels. Let rest 3-5 additional minutes.
That's all it takes. You chicken should be juicy, flavorful, and delicious! Happy Fried Chicken Day!

- Delicious Fried Chicken with my Roasted Corn Salad and Potatoes a la Michael Symon
Wednesday, July 7, 2010
Looking for the Best...
REPOST FROM DECKONFOOD.COM. http://deckonfood.com/?p=423
Returning from Wyoming, I don't really have a lot of food stories which is why there hasn't been a post yet. It wasn't that we didn't eat, but more that everything was more of a big event that featured just some of your basic barbeque items like hamburgers and hot dogs and potato salads and the like. Not there is anything wrong with those; I quite enjoy my mom's potato salad. But there was one takeaway from the weekend, one thing that got me thinking, one thing that was worth writing about.
When you tell people that you've started a food blog, and you've gotten into cooking and reviewing restaurants, they start telling you their stories. They talk about the places that they enjoy eating and that I should try. They talk about what they've heard about certain foods. They tell you about what their favorite ingredient is. Food is like sports in a way; it's something that nearly everyone has an opinion on, and it's something that can be debated endlessly (I was going to say politics, but food has a much more positive connotation like sports). My favorite of these conversations are the "Best of..." conversations. It's something that people seek out, and enjoy talking about. My brother-in-law told me that he had the best hamburger of his life in Casper, WY. My mom told me that she is still on the search for the best cornbread recipe ever (by the way, if you have any recommendations, please let me know).
On the flight coming back, I got to thinking, what do I want to find the best of in Seattle? And where do places currently rank? I decided to narrow my list to Seattle for the time being because it is easier for me to find. As I travel a little bit more, I hope to be able to add a Best of the US post. But without further ado, here is my wish list if you will, and who currently has top billing. And please, don't tell me I'm a moron because of a place I picked; tell me a place that's better, and I'll go. This is an ever evolving post about finding the best of the best in Seattle and I will add pictures, new categories, and new leaders as I go.
Best Hamburger Under $10
Red Mill Burgers - Red Mill Deluxe with CheeseBest Hamburger Over $10
Sport - Tillamook Cheddar Burger (now Cheddar Angus Cheeseburger)Best Wood-Fired Pizza
DelancyBest Barbeque
Gabriel's Fire - Brisket and Pork RibsBest Fish and Chips
Currently undecidedBest Dessert Ice Cream
Fainting Goat Gelato - Cinnamon GelatoBest Dessert Pie
Macrina Bakery - Lemon TartBest Breakfast Bakery
Bakery Nouveau - Twice-baked Almond CroissantsBest Breakfast Traditional
Currently UndecidedBest Mexican Food
Gordito'sBest Thai Food
May Restaurant and Lounge - Pad See IewBest Sushi
Umi's Sake HouseBest Italian
Brad's Swingside CafeFriday, July 2, 2010
Deck on The Rock WFP - Repost from Deckonfood.com
A few weeks ago a group of us at the office that all graduated or are currently enrolled in the UW MBA program (and one adopted member) decided that it would be good to get together every once in awhile and go out and have lunch together. It's a great way to continue to develop our network, get out of the office from time to time, and find great little places to eat around the Bothell/Mill Creek area. When we went to the first lunch, I solicited a few ideas and the group ended up choosing Dim Sum. However, there was one choice that was eliminated, but kind of stuck with me; The Rock Wood Fired Pizza. A great Seattle wood-fired pizza is one of my three "searches" right now (the other two being the burger and barbeque...there will be a post about this). So, when one of my co-workers wanted to go to lunch, I suggested we go check it out.
 The Rock is technically located in Mill Creek, though it is pretty much right on the border of Bothell and Mill Creek, a scant 5 minute drive from the office. It is in what looks to be a pretty new shopping area. From the outside, it's pretty non-descript, though when you walk in, you can see why it is called "The Rock". There is a large, open dining area with two floors and the bar in the back, all covered with rock-and-roll memorabilia. Each stair going up to the second floor has the name of a different legendary r
 ock band. My first reaction is this is a place that should be in Cleveland, near the Rock and Roll Hall of Fame; a perfect suburbia/strip mall/themed/slightly overdone restaurant (quite a difference from some of the local, neighborhood places throughout Seattle). When we sat down, our waitress (perfectly rocker chick with the tats and piercings and hair) asked us if we would like to look over the menu or go for the buffet. I asked for the menu, not really feeling a pizza lunch buffet where there are four varieties of pizza and a couplepastas sitting under heat lamps.
The menu was 4 pages long, and surprisingly only one page was actually pizza. There were sandwiches and pasta and salad and a whole host of other things. But, since I was in a place with "Wood Fired Pizza" in the name, I might as well go for a pizza. The pizza options were divided into two categories; red sauce and white sauce. There was a "specialty" section that had 4 options, but nothing really jumped out at me. After perusing the menu for a few minutes, I ended up going with the "Founder's Pie". It said in the description that it was the favorite of The Rock founders, so I thought it would be good to try.

The Founders Pie was on the red sauce side of the menu. It featured Italian sausage, pepperoni, mozzarella and ricotta cheese on a thin crust. It only took about 10 minutes for the pizza to make it out to the table which was perfect for a lunch during the work day. And the pizza wasn't too bad. The ricotta cheese wasnice and creamy, and the sausage had a pretty nice flavor (it may have even been made in house). The crust was ok, but a little on the soft side for me. I also think that they went a little overboard on the sauce and the mozzarella, disguising the taste of the crust a little bit. When I think of a good wood fired pizza, it's the crust that really makes it. After we ate, we paid up and headed out, about $15 for the pizza and a soda.

I know the food review portion is pretty short, but that's because there wasn't a whole lot to say. It wasn't amazing, but it wasn't terrible. It was definitely better than something like Domino's or Papa John's, but it wasn't anything like Delancy or even the pizza that I had a Lolita. Both of those were experiences that I remember, both from the preparation and the taste perspective. With Delancy, the crust was terrific, and with Lolita it was duck prosciutto! The Rockwasn't really an experience, just a place to get a quick lunch, which I think says a lot. I'd go back for a happy hour beer with some buddies after work on a Friday, but it's not somewhere I would drive out of my way to go, or take out of town guests.
The Rock is technically located in Mill Creek, though it is pretty much right on the border of Bothell and Mill Creek, a scant 5 minute drive from the office. It is in what looks to be a pretty new shopping area. From the outside, it's pretty non-descript, though when you walk in, you can see why it is called "The Rock". There is a large, open dining area with two floors and the bar in the back, all covered with rock-and-roll memorabilia. Each stair going up to the second floor has the name of a different legendary rock band. My first reaction is this is a place that should be in Cleveland, near the Rock and Roll Hall of Fame; a perfect suburbia/strip mall/themed/slightly overdone restaurant (quite a difference from some of the local, neighborhood places throughout Seattle). When we sat down, our waitress (perfectly rocker chick with the tats and piercings and hair) asked us if we would like to look over the menu or go for the buffet. I asked for the menu, not really feeling a pizza lunch buffet where there are four varieties of pizza and a couplepastas sitting under heat lamps.The menu was 4 pages long, and surprisingly only one page was actually pizza. There were sandwiches and pasta and salad and a whole host of other things. But, since I was in a place with "Wood Fired Pizza" in the name, I might as well go for a pizza. The pizza options were divided into two categories; red sauce and white sauce. There was a "specialty" section that had 4 options, but nothing really jumped out at me. After perusing the menu for a few minutes, I ended up going with the "Founder's Pie". It said in the description that it was the favorite of The Rock founders, so I thought it would be good to try.
The Founders Pie was on the red sauce side of the menu. It featured Italian sausage, pepperoni, mozzarella and ricotta cheese on a thin crust. It only took about 10 minutes for the pizza to make it out to the table which was perfect for a lunch during the work day. And the pizza wasn't too bad. The ricotta cheese wasnice and creamy, and the sausage had a pretty nice flavor (it may have even been made in house). The crust was ok, but a little on the soft side for me. I also think that they went a little overboard on the sauce and the mozzarella, disguising the taste of the crust a little bit. When I think of a good wood fired pizza, it's the crust that really makes it. After we ate, we paid up and headed out, about $15 for the pizza and a soda.
I know the food review portion is pretty short, but that's because there wasn't a whole lot to say. It wasn't amazing, but it wasn't terrible. It was definitely better than something like Domino's or Papa John's, but it wasn't anything like Delancy or even the pizza that I had a Lolita. Both of those were experiences that I remember, both from the preparation and the taste perspective. With Delancy, the crust was terrific, and with Lolita it was duck prosciutto! The Rockwasn't really an experience, just a place to get a quick lunch, which I think says a lot. I'd go back for a happy hour beer with some buddies after work on a Friday, but it's not somewhere I would drive out of my way to go, or take out of town guests.
Final Verdict - 2.75 Stars
Tuesday, June 29, 2010
Deck on Food is Moving!
For the past three months, Blogger has been home to my blog. In that time, my blog has hosted a staggering 1,300+ page views from 44 states (15 different countries). I've posted 78 reviews, recipes, and experiences. It's been a great ride, but unfortunately all good things come to an end. In ten days, I will close up my Blogger account.
However, this does not mean that my blogging days are coming to an end. Quite the opposite actually. I've officially launched DeckOnFood.com. That's right, I now have my own domain name. The new blog will allow me enhanced navigation, more creative freedom, and the opportunity to take my blogging to the next level. Additionally, I have joined the FoodBuzz Community as a Featured Publisher to further promote my writing. And to top it off, I know have a new logo!!
So, thank you to all of my readers and followers. This has been so much more than I had expected. I'll simul-post on both blogs for the next couple of weeks, but encourage you to bookmark the new blog.
Deck
.jpg)
Monday, June 28, 2010
Deck's Chile and Fruit Sauce
When I started to get more into cooking, one of the things that I started incorporating was sauces. It’s one of the things that I would always get when I went out to eat, but never prepared myself. I think that they are a great accompaniment to any meal, and can bring another level of depth to the cuisine. One of my favorite sauces is a fruit and chile combination that adds a little sweet and a little spice. Now I’ll admit that this recipe is originally from Bobby Flay, but it’s one that I wanted to be sure I shared because I use it with many different things, and have many different variations. It’s very simple, and doesn’t require a lot of steps, which makes it that much better (and is also why there are so few photos!).
Deck’s Chile and Fruit Sauce
 Makes about 2 cups
 - 3 cups Chicken Stock
- 2 chiles (Fresno or Jalapeño are my favorite) chopped.
- ½ cup rice wine vinegar
- ½ cup white wine vinegar
- ¾ cup granulated white sugar
- Fruit such as plums, cherries, Pomegranate, Passion Fruit, etc. (should be about 1½ - 2 cups worth; i.e. 2 plums).
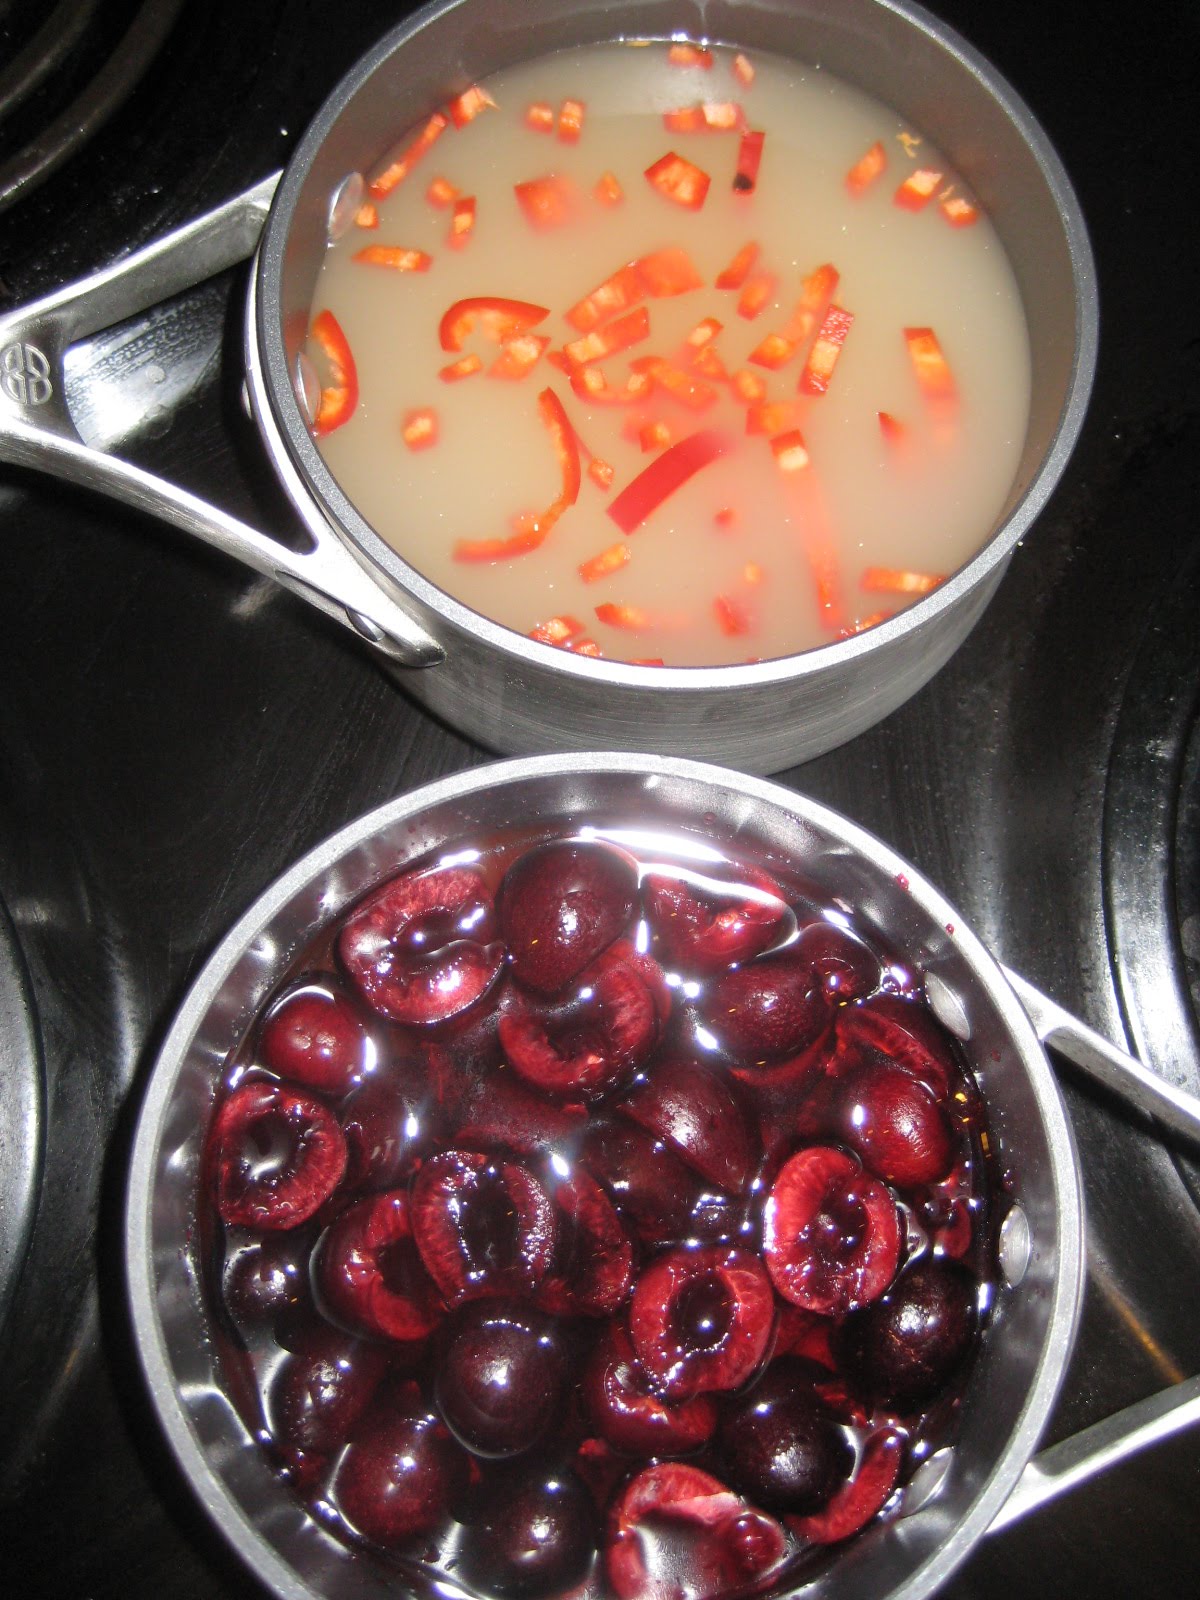
Step 1 – Combine the chicken stock and chiles in a medium sauce pan over high heat. If you want a spicier sauce, include more of the veins and seeds. For a milder sauce, remove and discard these prior to adding to the stock.
Bring to a boil, and then reduce by half (down to 1½ cups). This takes about 20 – 25 minutes. Strain into a bowl when done.
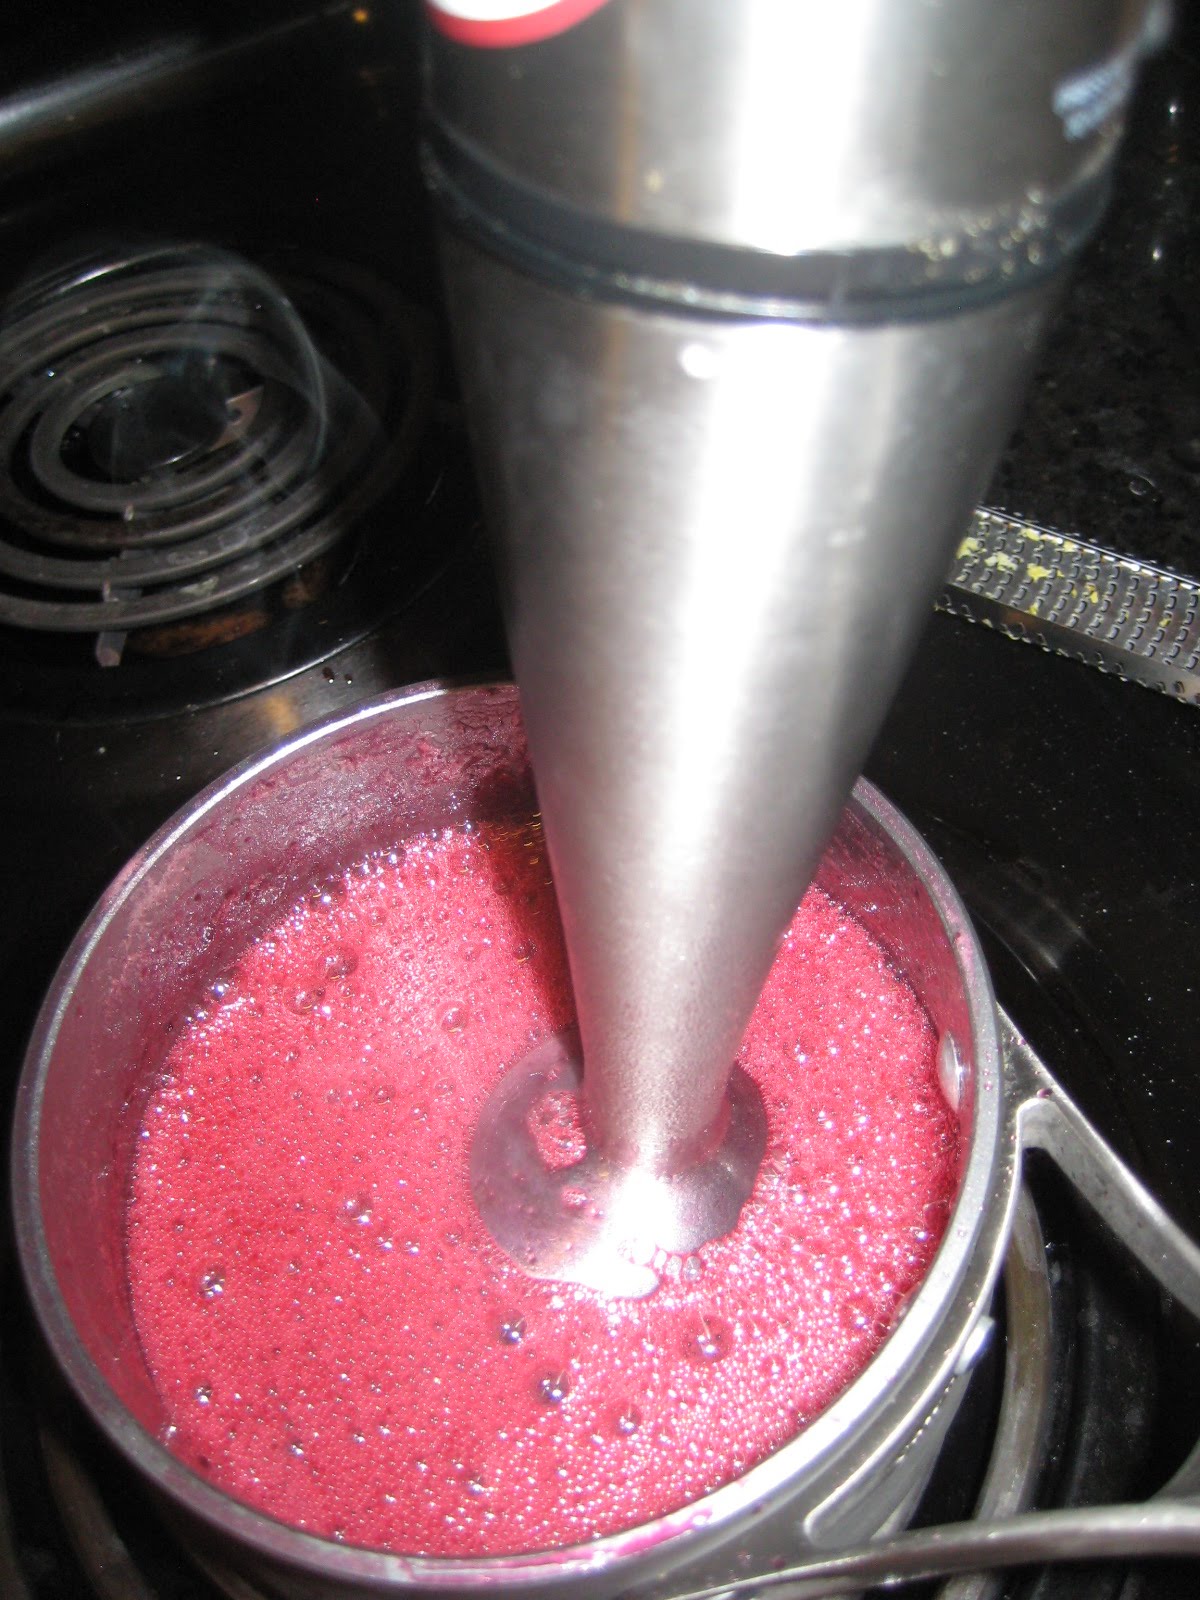
Step 2 – While the stock is reducing, combine the vinegars, sugar, and fruit in a medium sauce pan. If you are using fruit with an edible skin (i.e. plums, cherries) leave the skin on. Cook the mixture over medium heat until the sauce has thickened and the fruit is very soft. Then using a stick blender or a regular blender, puree the mixture until smooth. Strain the mixture into a clean sauce pan.

Step 3 – Add the reduced stock to the fruit mixture over medium-high heat stirring occasionally until a sauce consistency. The mixture will reduce by almost half (any more and it becomes more of a jelly). Keep an eye on the sauce as it is apt to boil over if you are not paying attention.
That’s it! I think that this sauce in its variations goes well with pork and chicken. My most recent variation was a Bing cherry and Fresno chile variety that I served over pork chops, and later over braised short ribs. It was excellent!

Sunday, June 27, 2010
Deck on Macrina Bakery - Seattle Restaurant Review

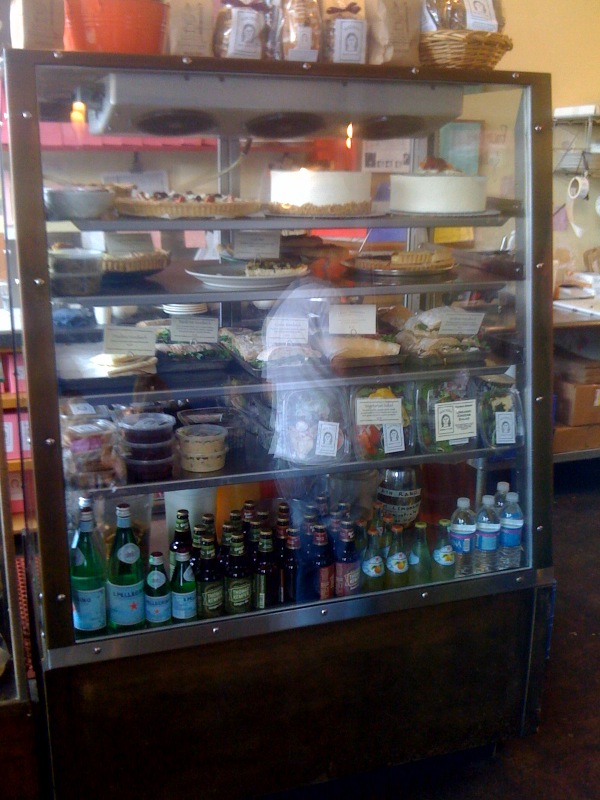
 Macrina Bakery actually has three locations around Seattle, the original being located in Belltown. I decided on the Queen Anne location simply because it was the closest, and even though I was stoked about the opportunity to go out and grab lunch, I still had work to get done. As I was driving up to the location, I was wondering if I was even in the right spot as I was simply driving through a neighborhood. Then, it opened up into a few small shops and restaurants. I'm beginning to realize that this is a feature of all of the Seattle neighborhoods (like 14th and 70th in Ballard or Tangletown in Wallingford) that is home to some great small local restaurants that I need to frequent more often. Macrina Bakery is a small, unassuming place, fitting in quite nicely with the rest of the neighborhood. Inside it is very simple with the bakery directly behind the counter, the beautiful creations laid out to the left, and a small seating area to the right. After looking through the cases, I placed my order to go, and after only a couple minutes had everything boxed up and I headed out the door.

 The sandwich was something that you can find at a lot of different places, and was about 3.5 stars worthy, but the tart made all of the difference. I will drive out of my way to get another one given the opportunity. If you want a good sandwich, and happen to be passing Macrina Bakery, it's worth stopping in. But, if you are a fan of lemon, and tart desserts, then this is an absolute must. I don't know if you will find anything better in Seattle (though you better believe if it's out there, I'll let you know).
Final Verdict - 5 Stars (lemon tart rating)
Deck's Coca-Cola Braised Short Ribs
Every now and then a group of guys get together to watch sports and eat meat, a day known as Meat Day. When I received my first invitation to a Meat Day, I knew I wanted to make something that would assure I got a second invitation. After a bit of consideration, I decided that I wanted to do a Coca-Cola braised short rib; trying to infuse some sweet and some spice to my Meat Day offering. However, after looking online for a recipe, I couldn't find anything that I really liked. Many of them had a lot of different ingredients, or were braised at a high temperature. After, a few different sites, I just decided to do it on my own and come up with a recipe. I don't know if you would call this so much of a braise since I ended up using the slow cooker, and quite a few ribs were completely submerged, but it definitely produced the result I was looking for.
This recipe is very simple, but it does take a bit of prep time. You start seasoning a minimum of 12 hours prior to placing the ribs in the slow cooker, and then let them cook for at least 6 hours. But it's worth it when the meat develops a buttery texture that just falls off the bone!
Deck's Coca-Cola Braised Short Ribs
Serves 4-6
Ingredients:
4 lbs. Beef Short Ribs
2 Liter Coca-Cola
~30 Bing Cherries
1/2 lb. thick cut bacon
3 Fresno chiles
1 small onion
1 cup chicken stock
 Dry Rub:
Step 1 - About 12-24 hours prior to cooking, salt and pepper the ribs. Leave them out at room temperature for about 30 minutes before recovering and putting back into the refrigerator.

Step 2 - 6 to 12 hours after salting, pull the ribs back out of the refrigerator, and liberally coat with the dry rub. Again, allow the ribs to sit out for about 30 minutes before returning them to the refrigerator.
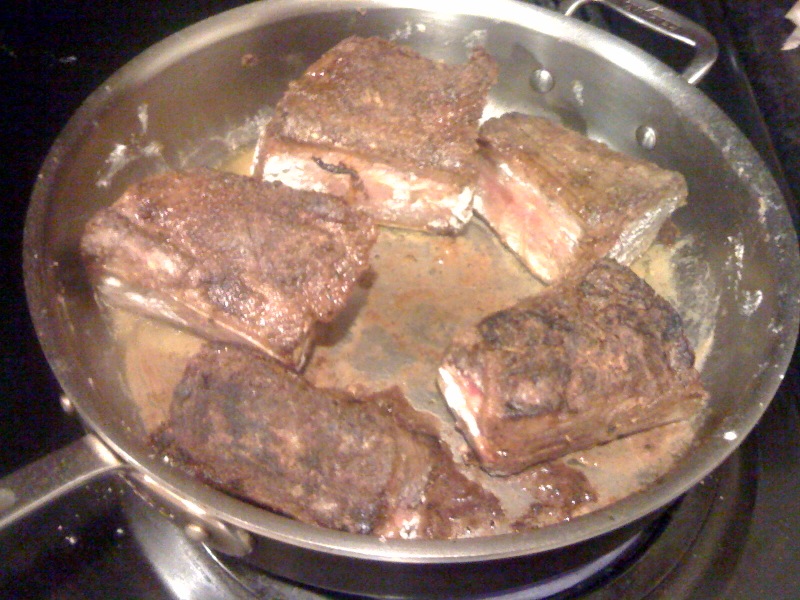
Step 3 - After the ribs have had time to absorb the flavors from the spice rub, they will need to be browned before adding to the slow cooker. Heat a couple tablespoons of oil in a sauce pan. Lightly dredge the ribs in some flour. Then quickly brown all sides, about 1-2 minutes per side. Add the browned ribs to the slow cooker.

Step 4 - While the ribs are browning, pit and cut the cherries in half. Also slice the Fresno chiles, cut the onion into 8 pieces, and cut the bacon into large chunks. All of this can be put into the slow cooker at this point.

Step 5 - Once all of the ingredients have been added to the slow cooker, add the braising liquids. Start by adding about a cup of the Coca-Cola first. Then add the chicken stock and the Worchestershire Sauce. Finish by adding enough Coca-Cola to have the pot just more than 3/4 full. All of the ribs should be at least 1/2 covered by the liquid.
Step 6 - Set your slow cooker to low, and set the timer for 6 hours, and let it go. At the end of the cooking time, you can leave it in the pot on warm for up to 6 hours before putting it into the refrigerator. At this point, you can also pour some of the liquid into a sauce pan to reduce and make a sauce. Be sure to skim off the fat from the sauce.

That's all. The ribs should be very tender and succulent with just a bit of heat, and pull right away from the bone.
This recipe is very simple, but it does take a bit of prep time. You start seasoning a minimum of 12 hours prior to placing the ribs in the slow cooker, and then let them cook for at least 6 hours. But it's worth it when the meat develops a buttery texture that just falls off the bone!
Deck's Coca-Cola Braised Short Ribs
Serves 4-6
Ingredients:
4 lbs. Beef Short Ribs
2 Liter Coca-Cola
~30 Bing Cherries
1/2 lb. thick cut bacon
3 Fresno chiles
1 small onion
1 cup chicken stock
2 tablespoons Worchestershire Sauce
 Dry Rub:
1 Tbsp Cinnamon
1 Tbsp Ground Nutmeg
2 Tbsp Light Brown Sugar
1 Tbsp Paprika
1 Tbsp Garlic Powder
1 tsp Jalepeno Pepper
2 tsp Ancho Chile Pepper
1 Tbsp Black Pepper
Step 1 - About 12-24 hours prior to cooking, salt and pepper the ribs. Leave them out at room temperature for about 30 minutes before recovering and putting back into the refrigerator.

Step 3 - After the ribs have had time to absorb the flavors from the spice rub, they will need to be browned before adding to the slow cooker. Heat a couple tablespoons of oil in a sauce pan. Lightly dredge the ribs in some flour. Then quickly brown all sides, about 1-2 minutes per side. Add the browned ribs to the slow cooker.
Step 6 - Set your slow cooker to low, and set the timer for 6 hours, and let it go. At the end of the cooking time, you can leave it in the pot on warm for up to 6 hours before putting it into the refrigerator. At this point, you can also pour some of the liquid into a sauce pan to reduce and make a sauce. Be sure to skim off the fat from the sauce.

Thursday, June 24, 2010
Pescado con Rajas y Crema - A simply delicious Rick Bayless recipe
 Even though I can't eat at his restaurants very often, Chef Rick Bayless is quickly becoming one of my favorite chefs. It's enjoyable reading his tweets everyday and seeing him on various Food Network shows. I also enjoy breaking out one of his cookbooks, and trying some of the incredible sounding and looking dishes which also allow me to try techniques and flavors that are definitely different than what I typically work with. The only thing is that usually the recipes are pretty involved and take a while, well at least for the amateur cook. When I made a mole for the first time (which turned out fantastic), it ended up taking me something like four hours. So, I usually don't take on a Rick Bayless recipe during the week. But, in flipping through the cookbook, I found something I figured I could pull off; Pescado con Rajas y Crema. Not only does it feature halibut, which happens to be fresh and in season right now (one of the perks of living in Seattle), but it looked like it would only take me an hour and a half which just fits into my after work cooking schedule.
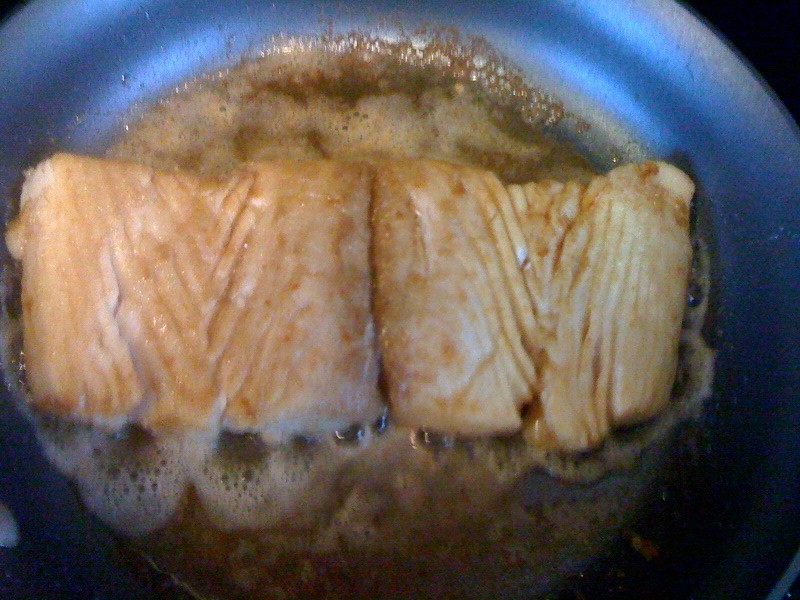
 Pescado con Rajas y Crema is a pretty simple dish. It features a quick fried fish with a poblano pepper cream sauce. To start, I seasoned the halibut with a little bit of salt and the juice of one lime. I left it to marinate for about an hour. From there, I turned to the sauce. Ok, I actually went and watched baseball for half an hour, then turned to the sauce. I roasted the poblano to remove the skin and bring out a bit of flavor. While it was roasting, I sliced some Vidalia onion using my new mandoline, which is far and away one of the greatest little tools that I never knew I needed!! I put the onion in a small sauce pan with a little bit of olive oil, and cooked until it was lightly browned. Then I added the poblano (after removing the skin and slicing thinly), and some garlic. After a couple minutes, I poured in the heavy cream and brought it to a simmer to allow it to thicken.
While the sauce was thickening, I pulled the halibut back out, took it out of the lime juice marinade, and patted it dry. Then I started getting some green beans ready as a nice side vegetable. The thing is I wasn't paying that much attention to the sauce when I suddenly heard some sizzling coming from the stove. I looked and it had boiled over. So I quickly ran over, pulled it off the heat, cleaned it up and returned it to the heat. This would be an ongoing battle for the next 10 minutes...

Finally, after conceding the battle to the sauce, and turning down the heat, I got the fish ready. I added a little butter and oil to a skillet, and let that heat until the butter started to brown. At that point, I quickly dredged the fish in flour, and put it in the oil/butter mixture. After a minute and a half, I flipped it over, cooked for another minute and a half, then added the sauce. The whole thing then simmered for a couple more minutes, before I took it off the heat and added it to a plate with some rice. Then I added a bit of parmesan cheese (that was a total ad lib, but it seemed like it needed it) and some scallions, and it was ready to go!
I can't wait until my next trip to Chicago when I can hit up Topolobampo or Frontera Grill or Xoco, but in the meantime, I'll keep making the delicious dishes in Rick Bayless' cookbook, hoping to do them the justice that they deserve.
For the actual recipe, check out Rick Bayless' cookbook Authentic Mexican.

Wednesday, June 23, 2010
My first attempt at Pasta from scratch
As I started to get into doing more of my own cooking, and moving beyond some of the simple things, I thought a lot about making things from scratch. When you go out to eat it's obvious the places that make their own pasta or their own tomato sauce or tortillas. The flavor is just different in a good way; with a freshness and taste that just can't be matched by mass produced versions. So this week, I decided to take on a couple of "made-from-scratch" foods. The first was bacon, which I wrote about here. The second was pasta, which was a completely different experience.
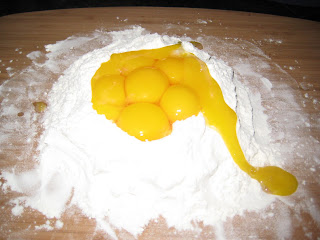
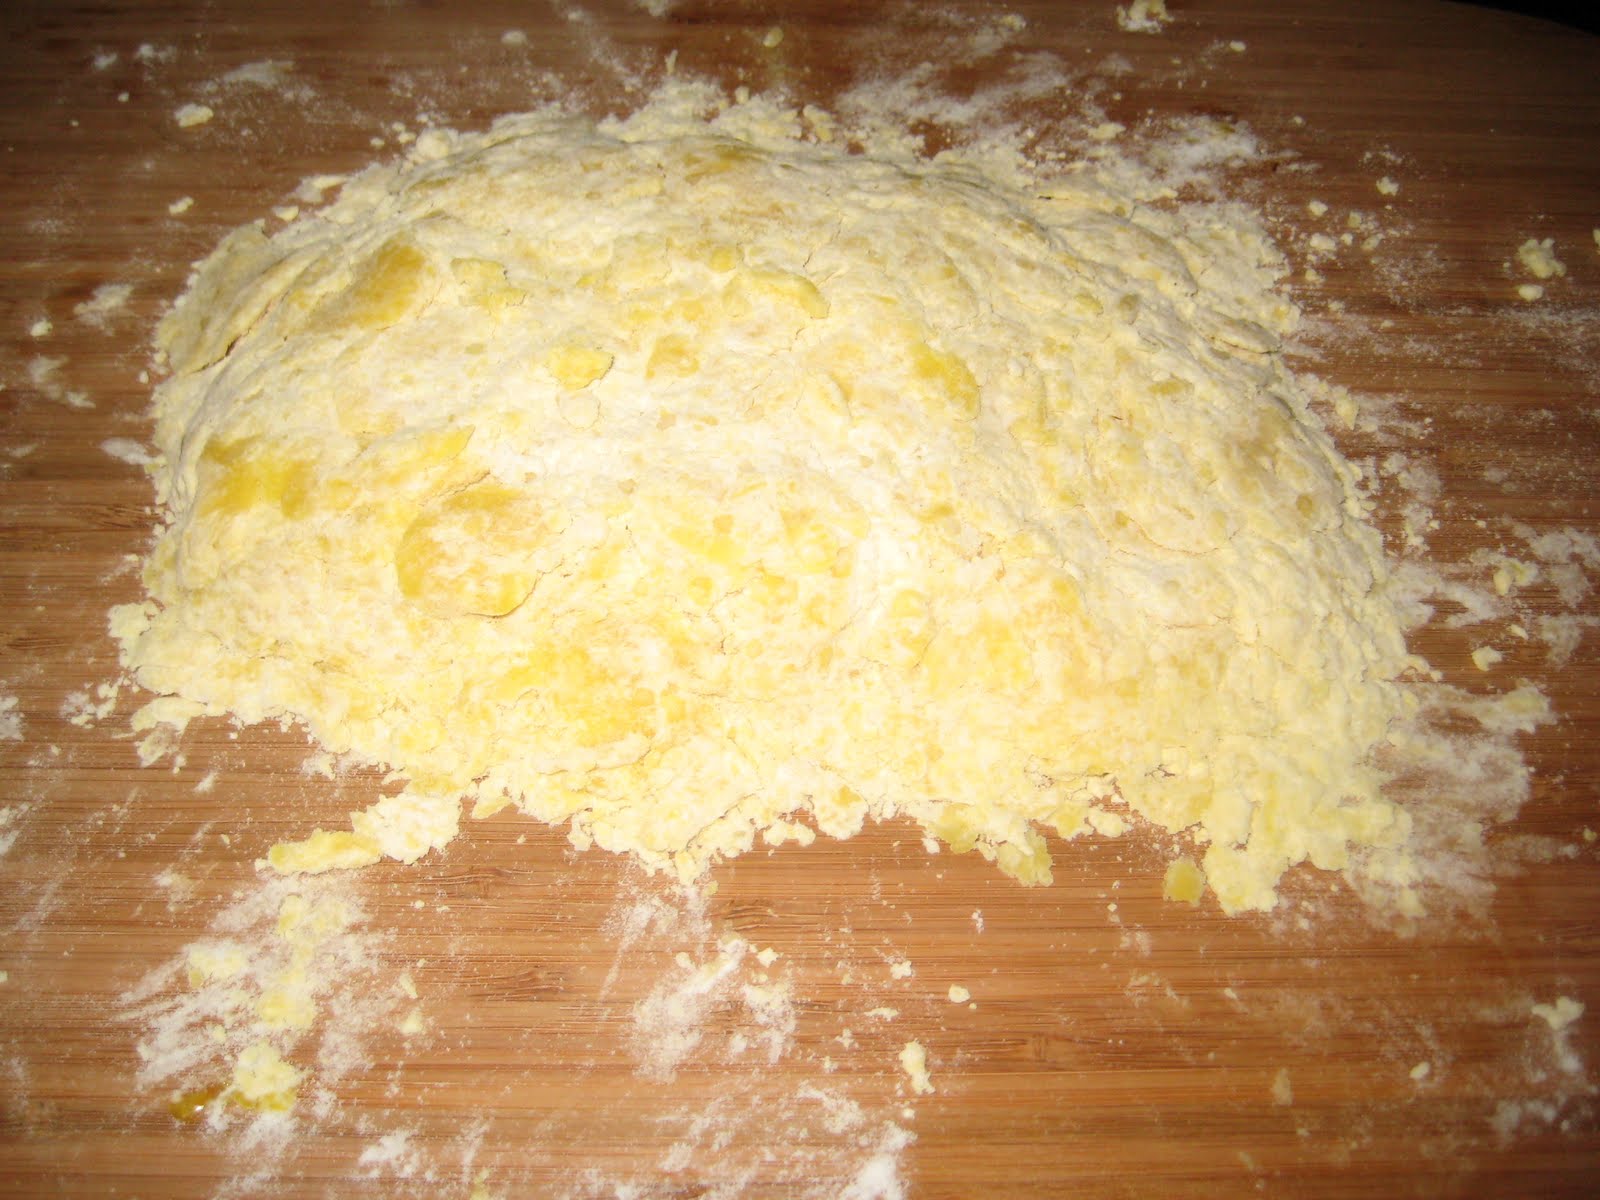
I decided to go with the Michael Symon pasta recipe for my first attempt at homemade pasta, primarily because there was a ravioli recipe that I wanted to try. The recipe itself is easy. You start with a cup and a half of flour that you build into a well. Inside the well you add nine egg yolks, and a little bit of olive oil. Then mix everything together, and let it rest for about 30 minutes. Then you cut it into 4 pieces, run it through the pasta machine, and it out comes pasta. Seemed easy, but this is where things started to fall apart, literally.

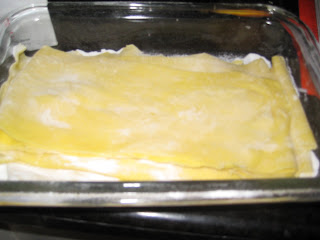
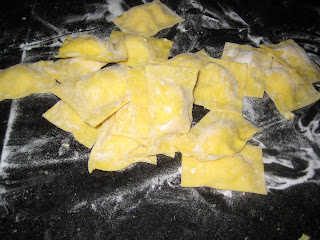
When I cut the dough to begin to run through the pasta maker, it completely fell apart. I looked at the recipe and it said it was supposed to be flaky and crumbly, so I tried to run it through the pasta machine. It didn't work so well, as it just fell apart as it went through. I went back to the recipe and it said I could add a little water. I sprinkled some on, and tried again, but it still fell apart. So I put on some more, and got a little overzealous. The top was almost soupy, and the bottom dry. I mixed it together the best I could and started running it through, but now it was too hard. The whole thing was just a mess. That piece was totally scrapped, and I pulled out the second. I again added some water, and ran it through the pasta machine at it's widest setting and it started to work! I narrowed the setting, and ran it through again, slowly thinning out the dough. It was still an adventure as I had trouble getting it to do in straight, or I would drop one end and it would tear. I ended up working that piece of dough through the machine at least a dozen times. But, I finally wound up with a sheet of pasta that seemed to be the consistency and thickness I was looking for.
Over the next 15-20 minutes, I was able to generate a couple more sheets of pasta. I then tore them in half and coated them in some rice flour to keep them from sticking together, and turned my attention to the filling. The thought was that these would be a simple ricotta cheese filled ravioli. I put the ricotta in the refrigerator over night to let some of the liquid drain out, except when I pulled it out the next day, there was no liquid. That had me feeling a little nervous. I took that ricotta, added some fresh parmesan and a little orange zest, and put it in the food processor to try and make a nice creamy mixture. I pulled out the sheets of pasta and put a few dollops of the mixture on half of the ravioli. I folded it over, and formed some square raviolis that actually looked like ravioli. Now all that was left was the sauce.
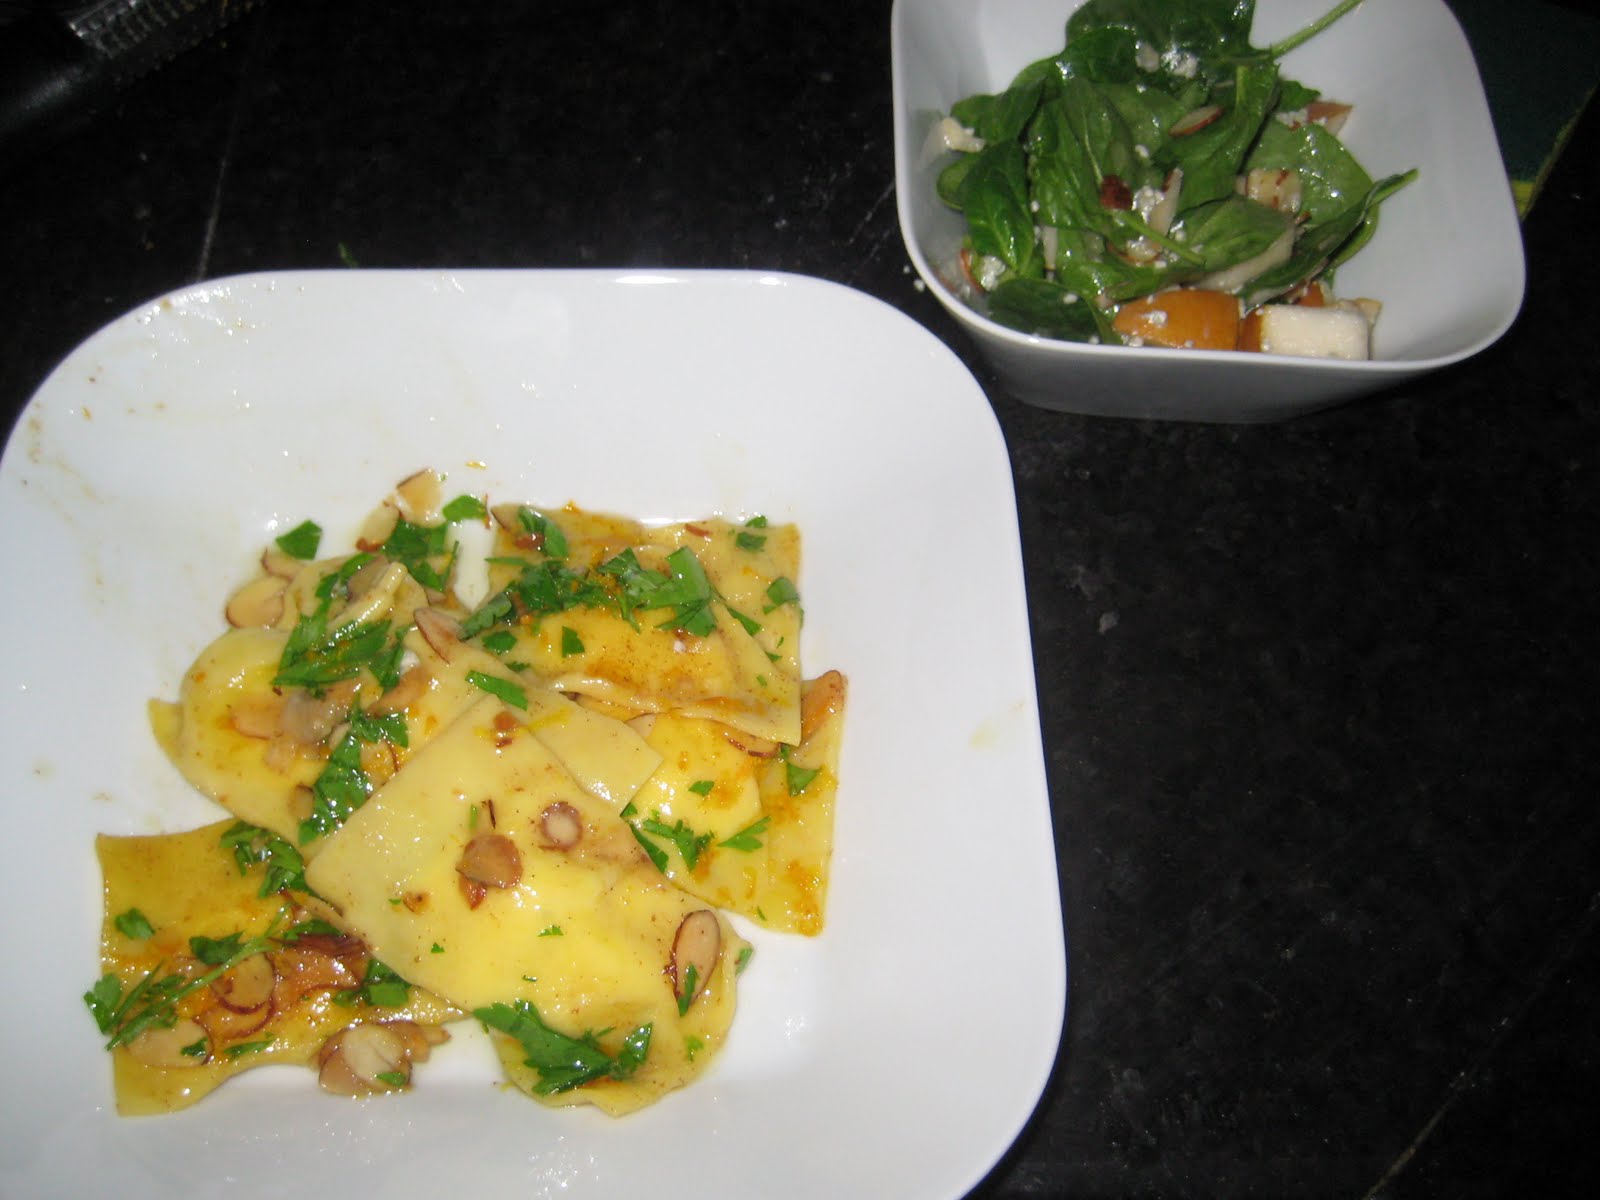
This recipe called for a brown butter sauce with almonds, orange, and parsley. Again, something seemingly simple with only a couple steps. Starting with 3/4 cup of butter, I melted it until it started to get foamy, then added the almonds. A couple minutes later, I added to orange zest and parsely, then tossed in the ravioli which had been boiling during this time. Everything was poured into a bowl and served with a roll.
The end result probably isn't what Chef Symon is capable of producing, or would be expecting based on the recipe. The ricotta filling seemed a little dry and just off tasting. I haven't quite figured out how to pick out a good ricotta. And the sauce didn't quite get to a "brown" butter state. I know there is a fine line between brown and burned, and I definitely erred on the side of not cooking long enough. It left the whole dish feeling a little overly rich. But, there was one bright spot; the pasta. It was actually light and delicious, and I was definitely surprised. I think the biggest problem was that even though I used "Large" eggs, the yolks were actually pretty small, and I probably should have used a full dozen. I ended up compensating with water which was ok. The nice thing is that I now know that I can make pasta, and will probably make a lot more of my own when I do pasta meals like chicken parmesan. It really doesn't take that long, and with all things, practice makes perfect! And then I can start adding different flavors to the pasta like spinach or sun-dried tomato or any number of things... :-)


When I cut the dough to begin to run through the pasta maker, it completely fell apart. I looked at the recipe and it said it was supposed to be flaky and crumbly, so I tried to run it through the pasta machine. It didn't work so well, as it just fell apart as it went through. I went back to the recipe and it said I could add a little water. I sprinkled some on, and tried again, but it still fell apart. So I put on some more, and got a little overzealous. The top was almost soupy, and the bottom dry. I mixed it together the best I could and started running it through, but now it was too hard. The whole thing was just a mess. That piece was totally scrapped, and I pulled out the second. I again added some water, and ran it through the pasta machine at it's widest setting and it started to work! I narrowed the setting, and ran it through again, slowly thinning out the dough. It was still an adventure as I had trouble getting it to do in straight, or I would drop one end and it would tear. I ended up working that piece of dough through the machine at least a dozen times. But, I finally wound up with a sheet of pasta that seemed to be the consistency and thickness I was looking for.
Over the next 15-20 minutes, I was able to generate a couple more sheets of pasta. I then tore them in half and coated them in some rice flour to keep them from sticking together, and turned my attention to the filling. The thought was that these would be a simple ricotta cheese filled ravioli. I put the ricotta in the refrigerator over night to let some of the liquid drain out, except when I pulled it out the next day, there was no liquid. That had me feeling a little nervous. I took that ricotta, added some fresh parmesan and a little orange zest, and put it in the food processor to try and make a nice creamy mixture. I pulled out the sheets of pasta and put a few dollops of the mixture on half of the ravioli. I folded it over, and formed some square raviolis that actually looked like ravioli. Now all that was left was the sauce.

This recipe called for a brown butter sauce with almonds, orange, and parsley. Again, something seemingly simple with only a couple steps. Starting with 3/4 cup of butter, I melted it until it started to get foamy, then added the almonds. A couple minutes later, I added to orange zest and parsely, then tossed in the ravioli which had been boiling during this time. Everything was poured into a bowl and served with a roll.

The end result probably isn't what Chef Symon is capable of producing, or would be expecting based on the recipe. The ricotta filling seemed a little dry and just off tasting. I haven't quite figured out how to pick out a good ricotta. And the sauce didn't quite get to a "brown" butter state. I know there is a fine line between brown and burned, and I definitely erred on the side of not cooking long enough. It left the whole dish feeling a little overly rich. But, there was one bright spot; the pasta. It was actually light and delicious, and I was definitely surprised. I think the biggest problem was that even though I used "Large" eggs, the yolks were actually pretty small, and I probably should have used a full dozen. I ended up compensating with water which was ok. The nice thing is that I now know that I can make pasta, and will probably make a lot more of my own when I do pasta meals like chicken parmesan. It really doesn't take that long, and with all things, practice makes perfect! And then I can start adding different flavors to the pasta like spinach or sun-dried tomato or any number of things... :-)
Monday, June 21, 2010
Bringing home the bacon...Literally
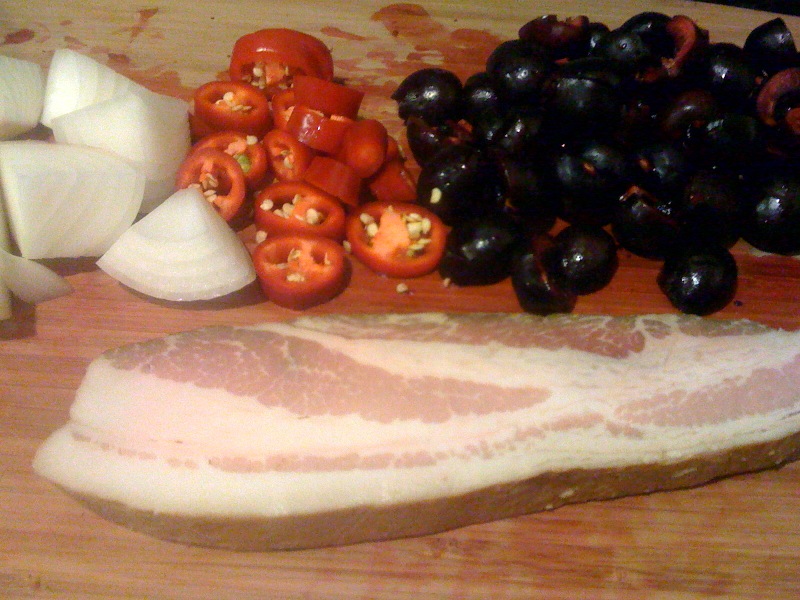
When I purchased Michael Symon's cookbook a few weeks ago, I was casually flipping through it when something caught my eye. I stopped, and checked out the recipe and knew that it was something I just had to make. It was Bacon! That's right, a recipe for making bacon at home. Considering I enjoy eating bacon and cooking with bacon, and I purchase it every time I go to the store, it only seemed logical that some day I go ahead and make it myself. I started looking through the recipe and realizing just how simple it was until I hit a small problem; bacon is lightly cured and then smoked, and unfortunately I didn't have a smoker. So, I put the idea of making bacon on the back burner until the day I got a smoker.

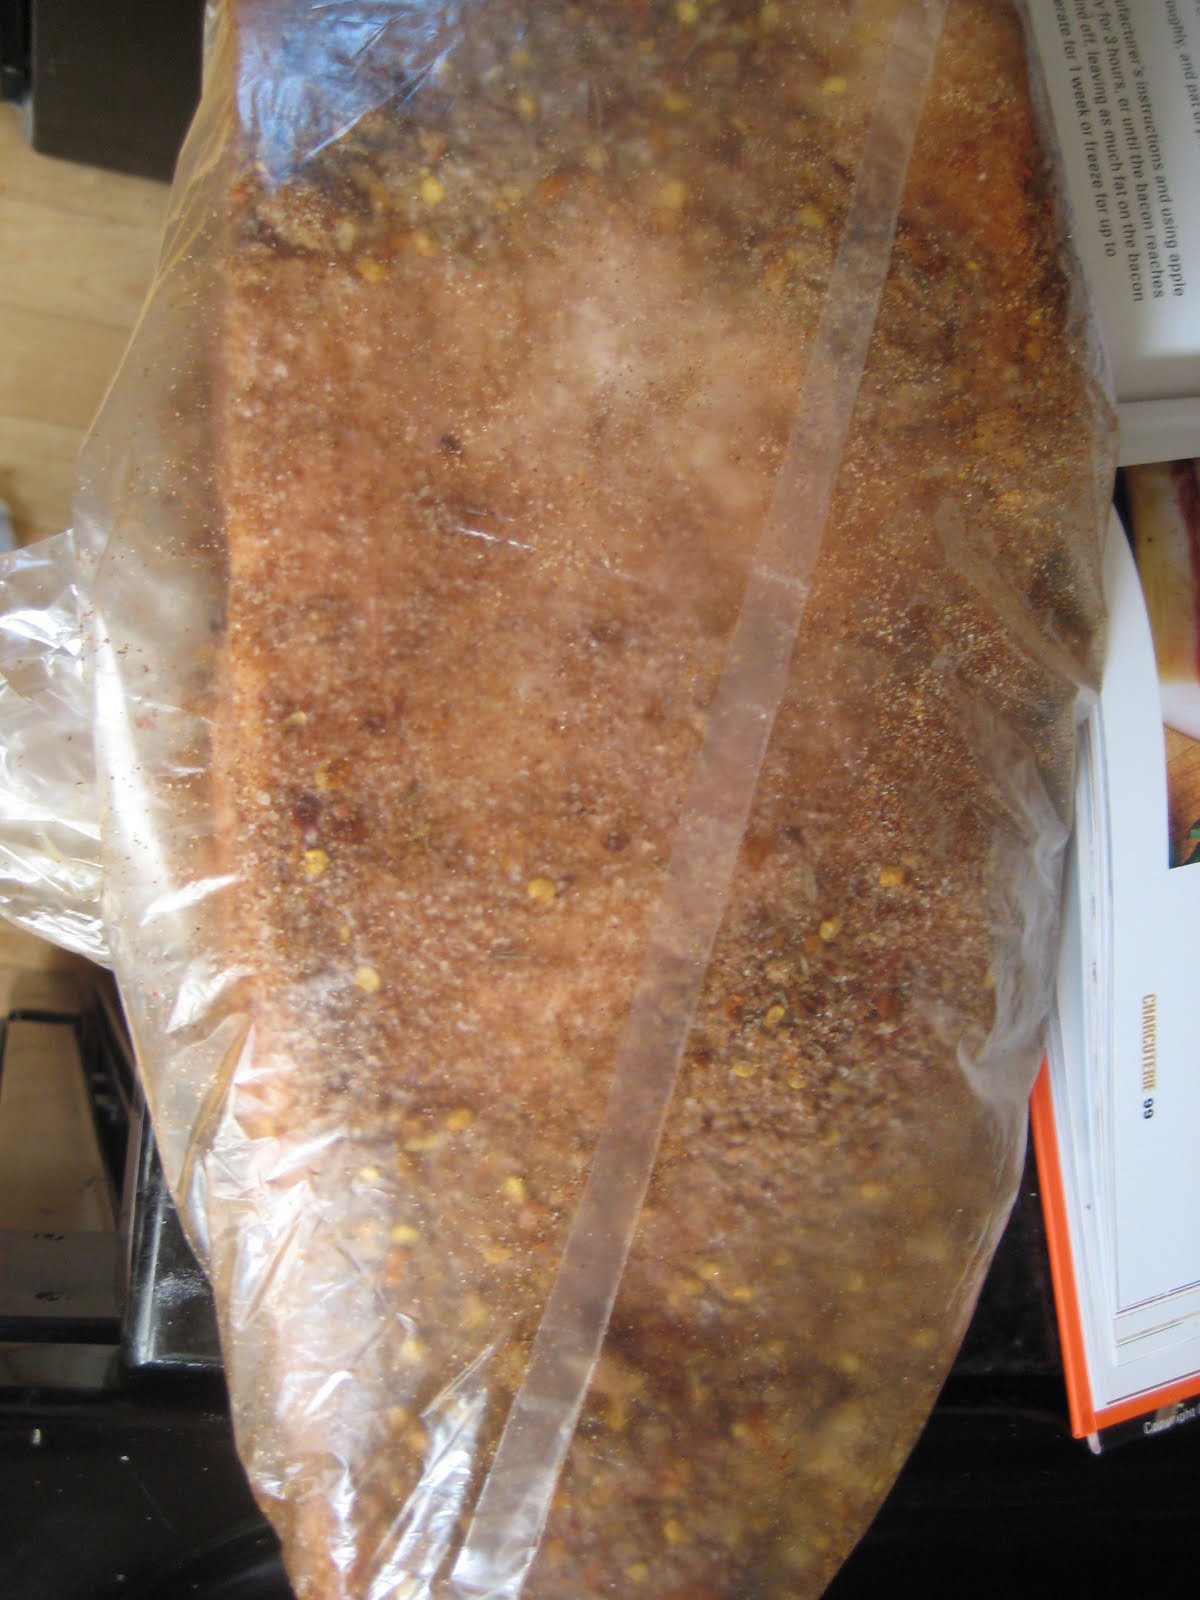
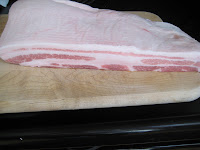 The bacon making process is quite simple, but takes a bit of time. It starts with a piece of pork belly. Following Michael Symon's recipe, you then add some kosher salt, a bit of pink salt, some paprika, red pepper flakes, brown sugar, honey and cumin. All of this is spread over the pork belly, and then put in a big bag. Then for the next week the bag gets flipped daily as the salt pulls out some of the moisture, and the flavors are incorporated into the meat. After a week, the pork belly is removed from the bag, rinsed, and then put on a rack in the refrigerator to continue drying. A couple days later you simply smoke it for a couple hours until it is cooked through, and that's it.
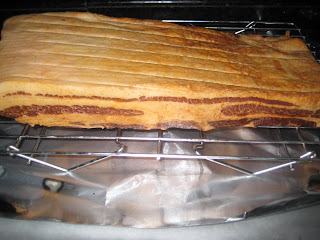

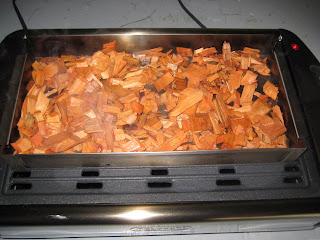
Then, a couple of weeks ago I was at Williams-Sonoma spending some of our wedding money when I noticed a little metal box. Upon closer inspection I realized it was a smoker! This small box is designed to sit on top of a gas grill with wood chips in the bottom. As the box heats, it slowly heats the wood chips as well, causing them to char and smoke without actually igniting. It's a fantastic little contraption that sits right on top of the DeLonghi indoor grill that we received as a gift, and it is just big enough to allow me to smoke something like a half rack of ribs, a couple of salmon filets, or bacon! I bought it that day, fully intending to make bacon as soon as I had a chance.
 The bacon making process is quite simple, but takes a bit of time. It starts with a piece of pork belly. Following Michael Symon's recipe, you then add some kosher salt, a bit of pink salt, some paprika, red pepper flakes, brown sugar, honey and cumin. All of this is spread over the pork belly, and then put in a big bag. Then for the next week the bag gets flipped daily as the salt pulls out some of the moisture, and the flavors are incorporated into the meat. After a week, the pork belly is removed from the bag, rinsed, and then put on a rack in the refrigerator to continue drying. A couple days later you simply smoke it for a couple hours until it is cooked through, and that's it.
When I pulled it out of the smoker, I cut off a small piece to try. The flavor was pretty strong and pretty smokey, and I was a little nervous that it wasn't going to taste that great. But, I let it rest on the counter, and then put it in the refrigerator to finish cooling down. I thought I would wait another day and then put it to the ultimate test; BLTs! So, tonight after work, I came home and got started on a nice, simple dinner of BLTs and Tomato Soup; not just any tomato soup, but the Michael Symon Spicy Tomato soup that I made a couple weeks ago.

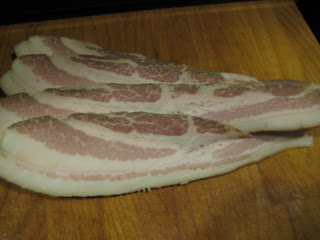
The soup was easy, it was something that I had made before, and knew that it would be good. However, I was a little nervous about the BLTs. I pulled out the bacon and cut off for thick slabs. The good news was that it definitely looked like bacon. Then I put it in the frying pan and it sizzled and cooked like bacon, throwing off great smells and lots of grease. Finally I pulled it off the heat and put it on some paper towels before cutting it up and putting it into the BLTs. The results were great. It had a nice smokey bacon flavor, and crisped up nicely. Plus, I still have more than 2 pounds of bacon that I can cut up however I need it!

This was definitely something that was a new and fun experience, and lends itself to a lot of variation. I don't think I will mess with the salt mixture, at least at first, but I can try and mess with some of the other ingredients. Adding more brown sugar or maple syrup to make it sweeter, or maybe some chile powders. And then smoking it with different woods. For this one I used cherry, but there is the more traditional Applewood or Hickory as well. So many different mixtures, so many different woods, and never having to buy my own bacon any more!
Subscribe to:
Comments (Atom)

